Wednesday, November 4, 2009

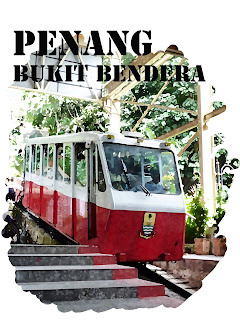
Digital Watercolor


1. Open a photo and press Ctrl+J to duplicate it.

2. Double click the layer name and type Dry Brush.

3. Click Filter.

4. Click Artistic

5. Click Dry Brush.

6. Click and drag the sliders to adjust the Dry Brush style.

7. Click OK.

8. With the Dry Brush layer still selected , press Ctrl+J to duplicate it.

9. Click Filter.

10. Click Blur

11. Click Smart Blur.

12. Click and drag the Radius and Threshold sliders to adjust the blur.

13. Select High in quality.

14. Click OK

15. Click the New Layer button to create a new empty layer.

16. Click the Opacity in the Layers panel and drag to the left to lower the opacity to 50%.

17. Press D to reset the default foreground and background colors.

18. Press Ctrl+Backspace to fill the layer with white.

The top layers fill with translucent white.

19. Click the Eraser tool.

20. Click brush picker.

21. Click a large chalk style brush and adjust ites diameter as necessary using the slder.

22. CLick and drag in the document using short irregular strokes until the painting is white.

23. Click the word Opacity and drag to the right to increase the opacity to 100%.

24. Press the left bracket key several times to reduce the brush size.

25. Continue clicking and dragging in the image to complete the painting.

26. Press Ctrl+E to merge the two top layers.

27. Press Ctrl+J to duplicate the layer.

28. Click Filter > Texture > Texturizer

29. Select sandstone

30. Click and drag the Scaling and Relief sliders to look like rough water color.

31. Click OK.

32. Click the layers option and select Screen.

High Contrast Stylised Image


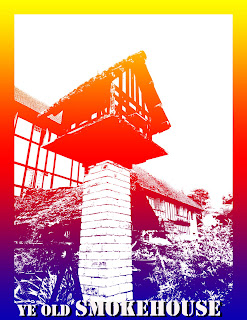
1. With an image open, click the Threshold button in the Adjustment panel.

2. Click and drag the slider to the right to make more tonal values shift to black or to the left to change more tones to white.

3. Click the New Adjustment Layer button.

4. Click Gradient.

Note: Clicking Solid Color produces a two-tone stylized effect with only one color and either white or black.

The Gradient Fill dialog box appears.

5. Click in the color bar to open the Gradient Editor.

6. Click a different preset.

7. Click OK to close the Gradient Editor dialog box.

The gradient is applied as a seperate adjustment layer covering the image.

8. Click the option box above the layers section and select Lighter Color to make the gradient cover only the black areas in the image, leaving the other areas white.

The gradient layer blends with the high contrast of the image.

Tip: Instead of Lighter Color, click the blend mode in the Layers panel and select Darker Color.

Tip: Create own custom gradient in the Gradient Editor by double clicking in each of the lower color stops under the gradient to open the color picker and select a new color.

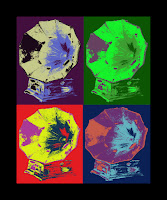
Posterize a photo - Andy Warhol style


1. Press Ctrl+J to duplicate the background layer.

2. Click the Black and White button in the Adjustment Panel.

3. Click Auto to see if the contrast improves.

4. Move the color sliders to enhance the contrast.

5. Click the arrow to return to the Adjustment panel list.

6. Click the Posterize button in the Adjustment panel. The options in the Adjustment Panel changes.

7. Type a low number such as 4 in the levels data field.

8. Click the arrow to return to the Adjustment panel list.

9. Click the Gradient Map button in the Adjustment panel.

10. Click in the gradient.

11. Click two areas below the gradient bar to add two more color stops.
(Note: The number of color stops should match the levels of posterization that you entered in step 7.)

12. Click the leftmost color stop to select it.

13. Click the leftmost color stop to select it.

14. Click and drag the color slider.

15. Click in the color selector to select the darkest of the four colors you will use.

16. Click OK to close the Select stop color dialog box.

17. Repeat steps 12 to 16, selecting each of the other three color stops to change the color.

18. Click OK to close the Gradient Editor.

19. Click the Black and White adjustment layer.

20. Click and drag the color sliders to change the amount and areas of posterised colors.

21. Press Ctrl+S to save the file with all the layers so you can readjust it later